Housing and Shelter
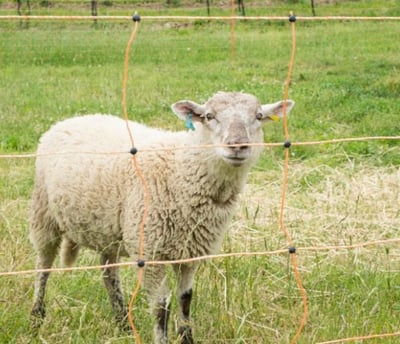
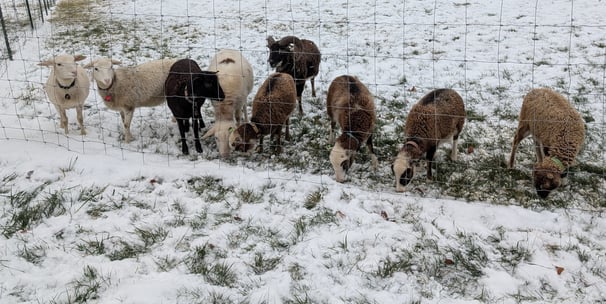
While sheep are hardy, they need protection from the elements, especially in a Michigan climate.
Basic Needs: Protection from wind, rain, snow, and intense summer sun/heat.
Shelter Type: A three-sided shed open to the south or east (away from prevailing winds) is often sufficient. Access to a barn is also excellent. It doesn't need to be heated, but it MUST be dry and draft-free at ground level.
Space: Allow approximately 15-20 square feet per adult ewe inside the shelter. More space is needed during lambing.
Ventilation: Good airflow above sheep level is crucial to prevent moisture buildup and respiratory issues. Avoid damp, stuffy barns.
Bedding: Provide a dry bedding pack, especially in winter and during lambing. Straw or wood shavings work well.
Step-by-step guide to building a hoop house:
Materials You'll Need:
Cattle Panels: Standard 16-foot long by 50-inch high panels work best. The number depends on how long you want the shelter (one panel creates about a 16-foot long section if laid flat, but less when arched).
T-Posts: Get heavy-duty T-posts, usually 6 or 7 feet long. You'll need at least 4 per panel (2 per side), plus potentially more for end walls or extra stability.
T-Post Driver: Essential for driving T-posts deep and straight. Rent one if you don't own one.
Heavy-Duty Tarp: Choose a strong, UV-resistant tarp (silver/brown often lasts longer) that is large enough to cover your structure with plenty of overhang (e.g., a 12'x20' or 16'x20' tarp for one arched panel).
Fasteners: Heavy-duty UV-resistant zip ties, baling twine, or strong wire for attaching panels to posts. Bungee cords or rope with grommet clips for securing the tarp.
Optional: Plywood or additional panel sections for end walls, foam pipe insulation or pool noodles to protect the tarp, ground anchors.
How to Build It:
Choose Your Site: Select a location that is well-drained and preferably slightly elevated to avoid water pooling inside. Consider the prevailing winds in your area (especially for winter in Michigan) – you'll likely want one end wall facing the wind.
Set the T-Posts:
Decide on the width and height. Bending a 16-foot cattle panel typically creates an arch about 7-8 feet wide at the base and roughly 6 feet high in the center. A wider base means less height.
Drive one line of T-posts deep into the ground (at least 2 feet) using the T-post driver. Space them about 4 to 8 feet apart.
Measure across to your desired width (7-8 feet) and drive a parallel line of T-posts, ensuring they line up with the first row. Having them perfectly parallel and straight is key.
Arch and Secure the Cattle Panels:
This is usually a two-person job. Stand a cattle panel on its long edge against one line of T-posts (inside the posts).
Carefully push/bend the panel upwards and over, forming an arch, until the other long edge rests against the inside of the opposite line of T-posts. The tension will help hold it initially.
Secure the panel firmly to each T-post it touches. Use strong wire or heavy-duty zip ties, wrapping around both the T-post nub and the panel wire in several places. Make sure it's tight!
If making a longer shelter, overlap the next panel by one or two squares and wire/zip tie the panels together securely along the arch.
Consider End Walls (Highly Recommended):
An open-ended tunnel offers little protection from wind or driving rain/snow.
You can create a partial or full end wall using:
Plywood: Cut to fit the arch shape and wire/screw it to the end panel and T-posts.
Cattle Panel Section: Cut a panel to size (use bolt cutters or an angle grinder) and wire it into place.
Tarp: Use a smaller tarp stretched across the end.
Leave one end at least partially open for access or build a simple gate/door. Definitely block the end that faces the prevailing winter winds.
Cover with the Tarp:
Protect the Tarp: Before covering, consider putting foam pipe insulation or cut-up pool noodles over any sharp wire ends on the cattle panels, especially at the top corners, to prevent them from tearing the tarp.
Drape the heavy-duty tarp over the arched structure, ensuring it's centered and has good overhang on both sides and ends.
Secure it Tightly: This is crucial! Wind is the biggest threat. Use the tarp's grommets with bungee cords, rope, or zip ties to attach it securely to the base of the cattle panels all the way around. Pull it as taut as possible. You can also anchor it to ground stakes or a wooden base frame if you build one. Don't leave loose flaps for wind to catch.
Add Bedding: Once the structure is secure, add a thick layer of dry bedding like straw inside for comfort and to absorb moisture.
Important Considerations:
Wind Resistance: Secure anchoring of T-posts and very secure tarp fastening are essential to prevent the shelter from becoming a kite.
Snow Load: While the arch shape helps shed snow, very heavy, wet snow (common in Michigan) can potentially weigh down or damage a basic panel shelter. Keep an eye on it during heavy storms and knock snow off if needed. Reinforcing with a central ridge beam (wood) can help if you expect heavy loads.
Predator Protection: This type of shelter offers minimal protection against determined predators like coyotes or dogs. It's best used within a secure perimeter fence.
Durability: Tarps degrade over time, especially under sun and wind. Expect to replace the tarp every few years. Heavy-duty zip ties can also become brittle.
This DIY shelter provides an affordable and quick way to give your sheep essential protection from the elements. Just be sure to build it sturdily and keep an eye on its condition, especially through Michigan's challenging weather!